

Design Lovely Valentine’s Day Wallpaper
When it comes to Valentine’s Day you have a plenty of design possibilities, from e-cards to website adaptations. But now and then it can be a little tricky when trying to solve from where to start. Also you may don’t have enough time to produce what you had in mind entirely from scratch. That’s way we are here, to try and help you as mush as we can.
In our little tutorial for Valentine’s Day, we are going to design beautiful Valentine’s Day wallpaper with a lot of love, heart and passion. But without further ado, we are going right into working mode, to get this tutorial quick & ease.
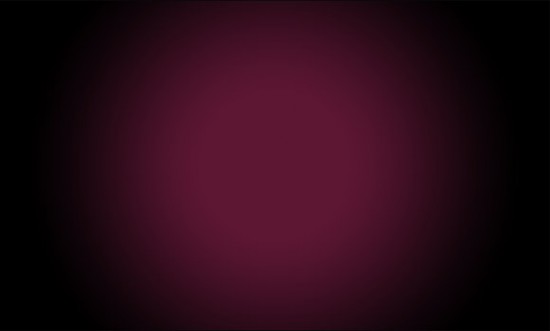
This is what we are making, and we are just few steps away from it.
First step:
We are going to start with a new document (700px x 420px).
Second step:
Next thing we are going to do is to create a new fill layer by Gradient and put the following color styles.
Color 1: #000000 at location 0%
Color 2: #5e1834 at location 70%
Style: Radial
Angle: 90 degree
Scale: 150%
 Of course, you can change the colors according to your taste, but let’s stick with these ones for first time.
Third step:
When we are done with coloring, we are needed to create a new layer over the first one.
Forth step:
Use a white brush tool as foreground color and regulate the brush settings to the specific values.
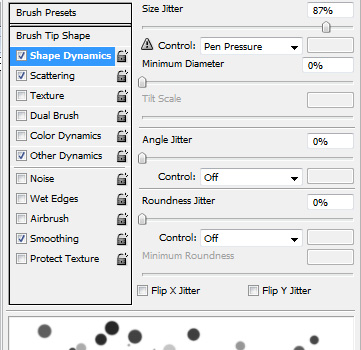
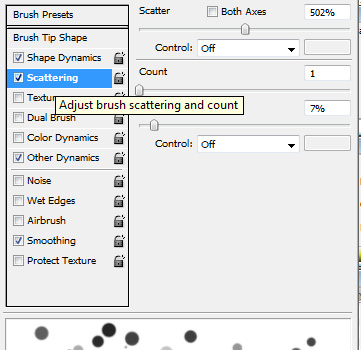
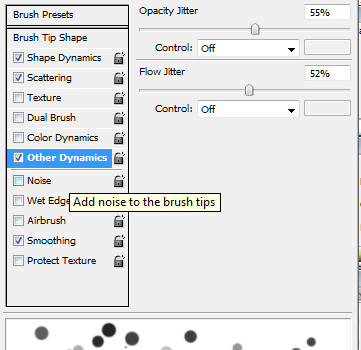 In addition to that change the brush thickness to 37 pixels and draw a small amount of circles in the center part of our wallpaper. Once more fine-tune brush size to 20px and depict some additional circles. You don’t need to draw circles in same size and same position like we did, but try not to wonder out of our path.
 Next thing we should create is a heart shaped brush.
Fifth step:
Go to the new document, and pick the custom figure tool and choose the heart shape.
Sixth step:
Sketch a black colored heart form to a roughly size around 200px, then press Ctrl, and click over the layer thumbnail where we strained the heart shape. Now we have the pixels of the heart shape selected.
Go to Edit – Define Brush Preset and provide some name for the brush like love, or something like that.
Seventh step:
Following that step we need to go back to our first document.
Eight step:
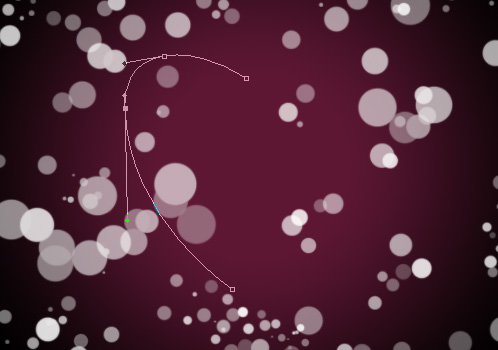
Again, we are going to open a new layer, and choose the pen tool and sketch a path like is picture underneath.
 Ninth step:
Devoid of touching the path, choose the brush tool and set the brush size to 11px and solidity 0px.
Tenth step:
Yet again select the pen tool with Stroke Path.
Eleventh step:
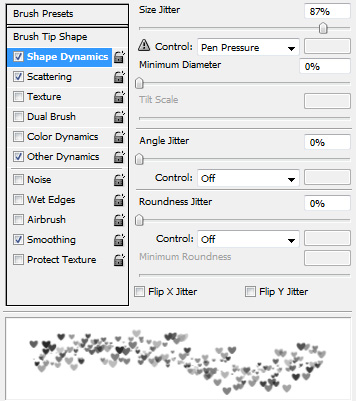
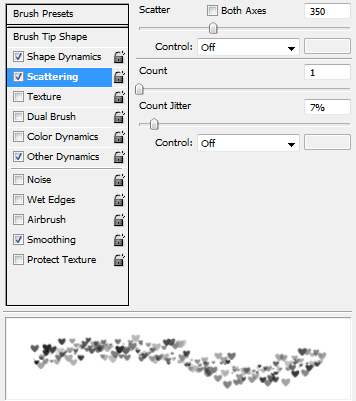
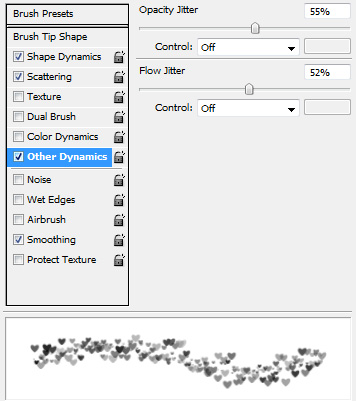
With no deleting the path, select the brush tool and choose the heart form that we’ve produced in our sixth step. Set the brush size to 9px and solidity 0px and also set the subsequent settings.
 After that select the pen tool and repeat the same action like we did in tenth step.
Twelfth step:
We are going to apply these styles to our new layer.
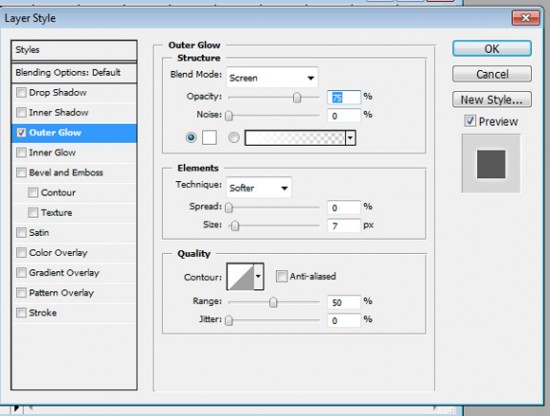 The result need to be like this:
 Thirteenth step:
Choose the Direct selection tool, and select Free Transform Path. From then we are going to select Flip Horizontal. You need to extend the form at the underneath by adding up a brand new node.
 Fourteenth Step:
We are going to perform the same set of actions in our new layer as we repeat the steps 9, 10, 11 and 12. So the result is going to be something like this.
 After that use pen tool to sketch a little curved path and do again the steps 9 and 10.
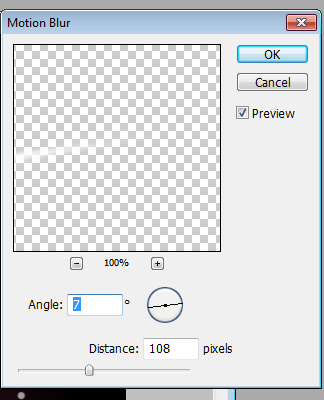
 Copy the settings to the motion blur curve.
 Last step:
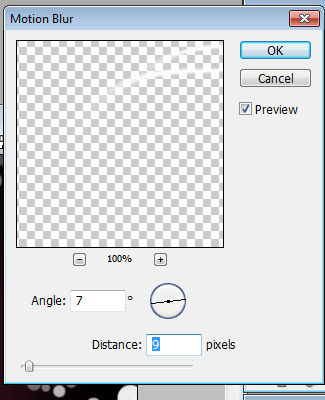
In a new layer, sketch two additional curves like the earlier one but with slight abridged size.
Copy the settings to the motion blur curve.
 And, as you can see we design the heart shape. The final touch is to apply text.
 Final touch:
Put the text Happy Valentine’s Day and the name of your love over the heart shape. The only remaining thing is to send your beautiful wallpaper to your love so he or she can enjoy Valentine’s Day with all of your love.

About the Author: Garlak Theodorakis
 My name is Garlak Theodorakis, I am graphic designer with almost 10 year experience in the field. Founded Tooft.com in january 2010 with idea to share my knowledge with the world.