
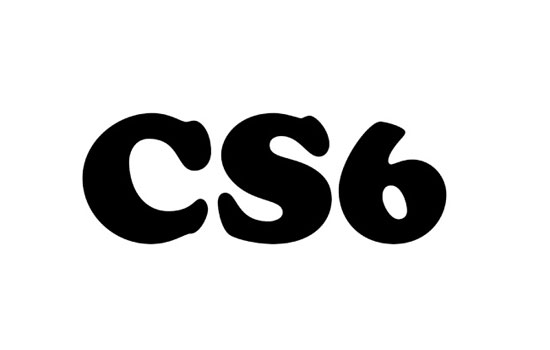
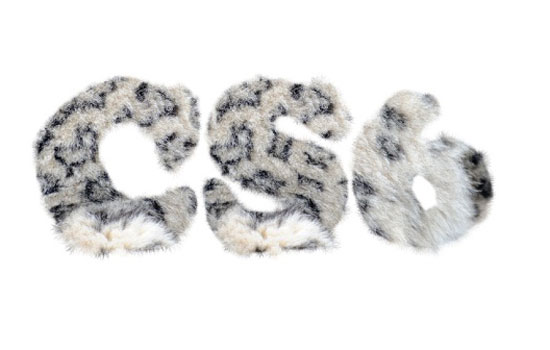
How to Create Text with Stunning Effect in Photoshop
In previously post we are introducing you with a little secret of Photoshop, so you can easily create stunning designs in just few steps. What we want is to create a simple tutorials so you can learn without some painful troubles alongside. It’s the same with this our new tutorial. It’s a very simple and jet very clever technique. Once you learn it, you are going to apply it all over.
First Step
On your computer open new file in Photoshop with a 550×350 pixels for the dimensions, and then simple put text you want to work with. You can do that with the Horizontal Type Tool (T).
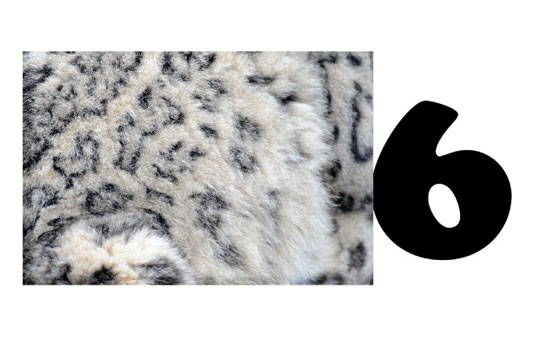
Second Step
Now it’s time to find some textures for our furry design. You can look on Google images for fur texture, and there is plenty gorgeous texture for you to work with. It’s important to place the texture you choose on top of the text you previously type.
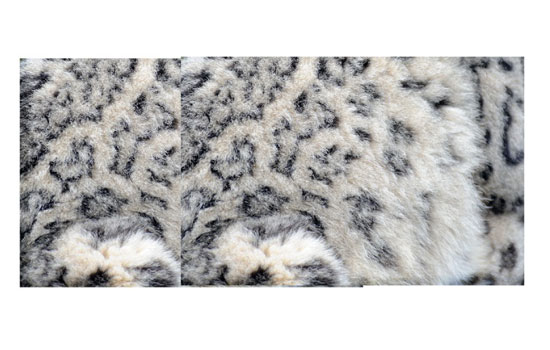
Third Step
Because I choose a smaller texture, I will need to duplicate it for covering the whole text.
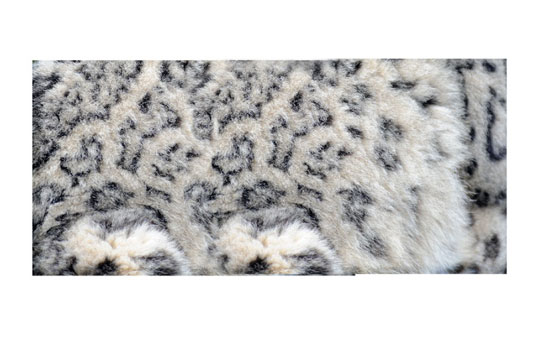
Fourth Step
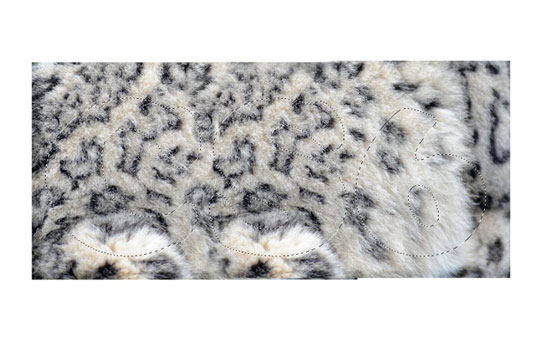
You can simple delete some small parts of texture, just to merge them perfectly. This step is very significant because we want to create a perfectly furry text.
Fifth Step
Now we are going on to the Layers Panel and need to select the layer with our text. Then just click on the layer thumbnail with the right mouse click, and choose Select Pixel. You are going to see your text inside texture.
Sixth Step
Now we going to need to simple select our texture layer and then go menu Layer – Layer Mask – Reveal Selection.
Seventh Step
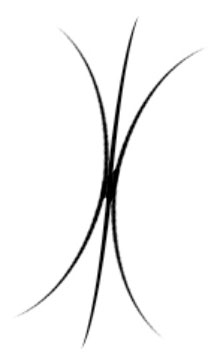
Next thing we are going to do is to create a little brush so we can use it in our design. First we are creating a simple one, like on the picture sample. Once you create a shape just go to Edit – Define Brush, and name it simple “furry”.
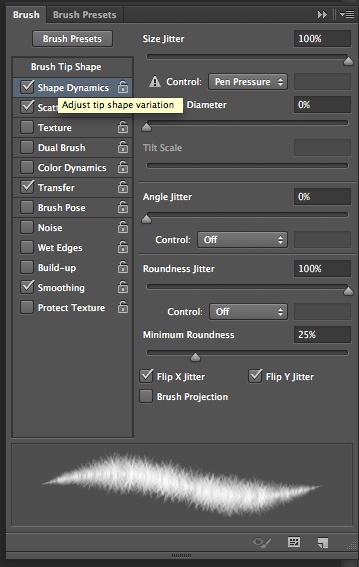
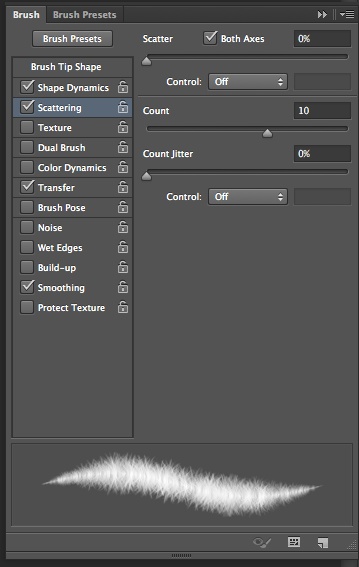
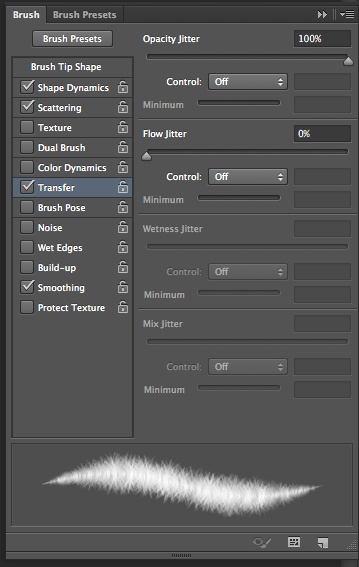
Eight Step
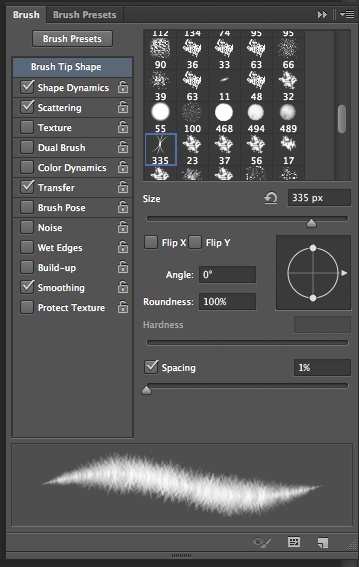
Let’s go to Photoshop main menu, and choose Window – Brush, and from there just click on the Brush Tip Shape and simple select the “furry” that we created just moments ago. Then follow our setting below, so you can create a perfectly furry brush for our project.
Ninth Step
With our brush from Brush Tool you are going to painting the edges of your letters, so you can create a stunning effect. You can play a little bit, and change the size of it, just that effect look even furrier.
Tenth Step
We are going to repeat that for all our letters in text.
Eleventh Step
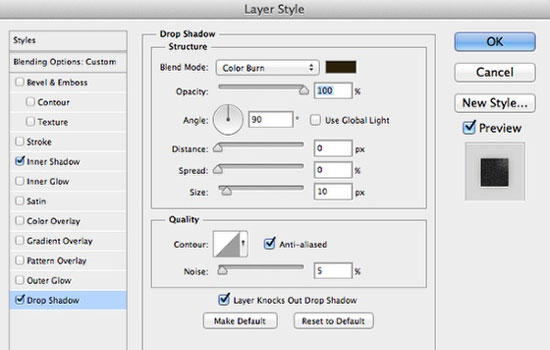
With a simple modification on Layer – Layer Styles – Inner Shadow we are going to apply our styles to all layers. This thing is helpful for the reason that you can apply the similar layer styles to numerous objects at one time. Even maybe expand the quantity of effects by addition to several folders at once.
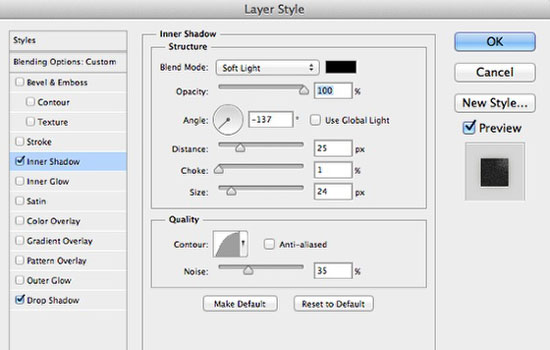
Little touch of Inner Shadow and Drop Shadow and we are done.
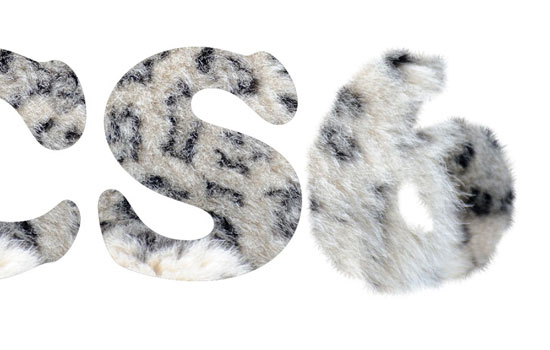
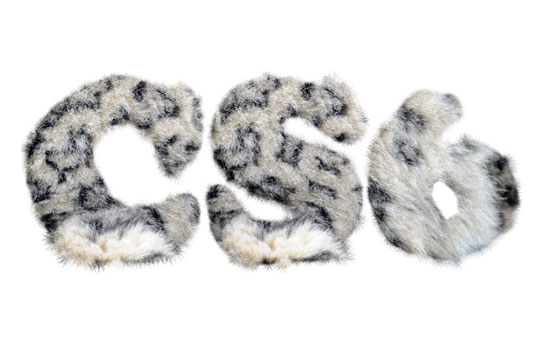
Twelfth Step
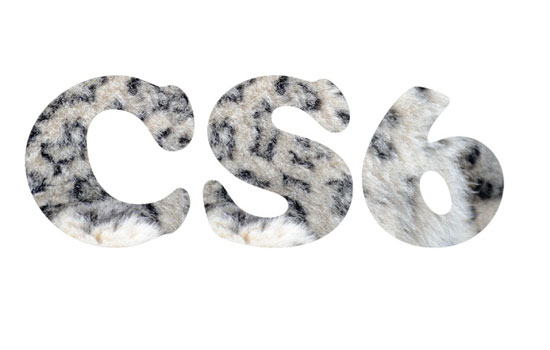
You can see our final product which is very nice and unique.
About the Author: Garlak Theodorakis
 My name is Garlak Theodorakis, I am graphic designer with almost 10 year experience in the field. Founded Tooft.com in january 2010 with idea to share my knowledge with the world.


Muy buena la explicación y lo creativo, también soy diseñador gráfico por mas de 25 años. Muy buena página. Felicitaciones!!