
Thunder Lightning Effects in Photoshop 4 steps Tutorial
1. Create a drawing with a black background, and on it a new layer Layer / New / Layer
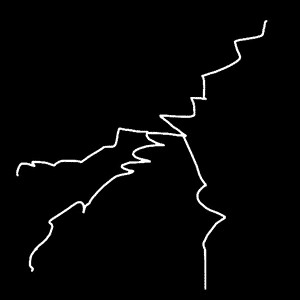
2. with the help of Brush tool draw lightning similar to below:
3. Adding the effect of Layer / Layer Style / Outer Glow to the following settings:
So that our drawing would look ...
1. Create a drawing with a black background, and on it a new layer Layer / New / Layer
2. with the help of Brush tool draw lightning similar to below:
3. Adding the effect of Layer / Layer Style / Outer Glow to the following settings:


So that our drawing would look like this:

4. We use the filter Distort / Displace the values Horizontal Scale 3%, Vertical Scale 3%, as a displacement map (Displacement map) to select Schnabel Effect (in the directory / Plug-Ins/Displacement Maps)
The end result:

About the Author: Garlak Theodorakis
 My name is Garlak Theodorakis, I am graphic designer with almost 10 year experience in the field. Founded Tooft.com in january 2010 with idea to share my knowledge with the world.


Great tutorial, Garlak! Thank you