
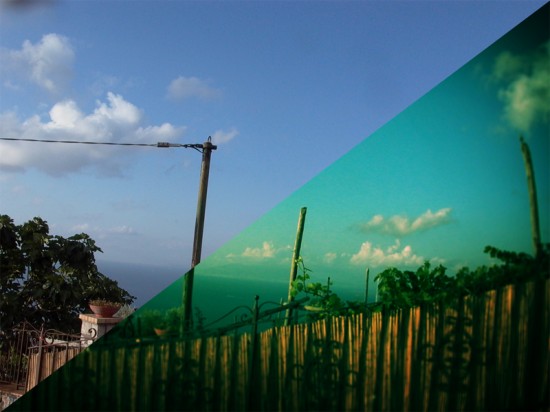
Photoshop Tutorial: How to get X-PRO LOMO look on your pics
Before we get into this adventure, I want to explain in a few words the meaning of X-Pro LOMO title. LOMO is a Russian company that produces optics and cameras, and the term Lomography in professional photography world mean wide-angle, distorted colors, expired film kind of photo aesthetic. So, you get that rustic and yet modern kind of photography. It’s very popular these days, especially because of many apps for smartphones camera. One of the main stone of hipster culture is lomography, so if you want to go with the flow this is the must tutorial.
So, I explain the meaning of term Lomography, but there’s also an x-pro term, which is kind of cross processing, a very unique technique in modern photography. Basically it means that you are using chemicals for one kind of film which is meant for another kind. And the term is not that modern as one can assume. Many photographers back in the days use slide film and than I they had luck develop that same film in the normal film lab. So that’s way we call it cross processing.
Tutorial for this is very easy, and it only has few steps, mainly because Photoshop already took care of many details that concern X-Pro Lomo effect. We are going to work on color of your pics, as well as explore some not so ordinary methods to widen and blur those same pics. This is mainly because all cameras in LOMO movement firstly had very simple and cheap lenses. For those who are not familiar with LOMO movement, there are plenty of manufacturers, but the famous ones are Diana, Holga and Lubitel. Basically there’s one in every European country.
So, choose image and open it with Photoshop.
First Step:
You’ll need to widen the lens angle of your pic, therefore go to Filter – Distort – Lens Correction, and simple move top slider little bit to the left side. It’s very important not to move slider a lot.
Second Step:
We are going to copy our image layer, and with Q on our keyboard enter quickmask mode. It’s important to press D, just to be sure we are painting in black, and with B we are going to select our brush tool. Select one of a big brush, and with full opacity and a low flow we are going to paint our image, but be careful because we don’t want to put any work on corners.
Third Step:
With previous step you’ll get red circle, and when you are finish, just press Q. When you exit quickmask mode you’ll go to Select – Modify – Feather and enter 15-20.
Fourth Step:
We are going to use some filter, just to blur our pic a little bit. Filter – Blur – Lens Blur. You can use 8, 67, and 0 as mark. Press OK when you are done. Once again we are going with Q and B, like in the second step. And once again stay away from corners. After that press Q, and repeat third step. We are going to make corners of our pic very dark.
Fifth Step:
Let go for Curves Adjustment Layer with an “S” curve. Now we are going to work in Green Channel with dot on the top right quarter and simple drag it to the left side. Then go to the Blue Channel and repeat the action, but instead dragging the dot to left you’ll go to the right.
Sixth Step:
Yet again we are going with Q and B, just a little bit to perfect out pic. After that exit quickmask, and then again go to Select – Modify – Feather for another Curves Adjustment Layer.
That’s it! You’ll have yourself a nice X-PRO LOMO pic.
About the Author: Garlak Theodorakis
 My name is Garlak Theodorakis, I am graphic designer with almost 10 year experience in the field. Founded Tooft.com in january 2010 with idea to share my knowledge with the world.