
Photoshop tutorial: Iris Blur – Depth of Field
If you want to take the photos with shallow depth of field you are going to need some nice lenses, or some very luxurious camera. But, if you are lacking those things do not despair because it is possible to digitally imitate shallow depth of field using our favorite piece of software called Adobe Photoshop. It will take only two minutes of your time, and your photo will be completely different.
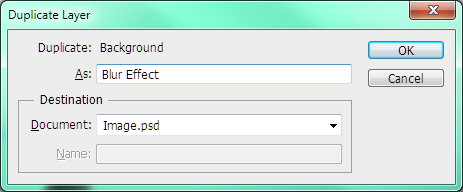
First step: In the layer box simple right click the layer called background, and then choose to duplicate layer. After that just name the new layer as Blur.
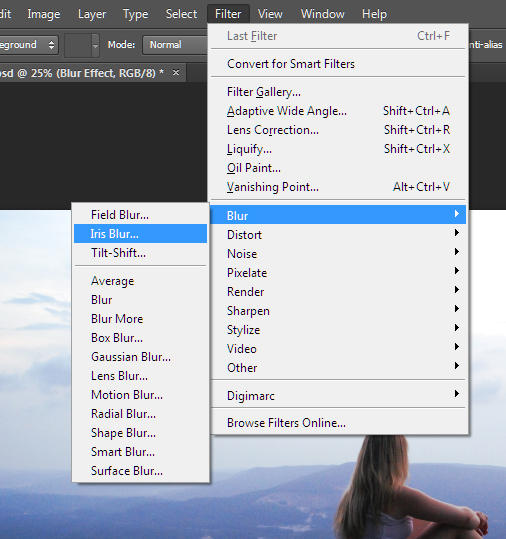
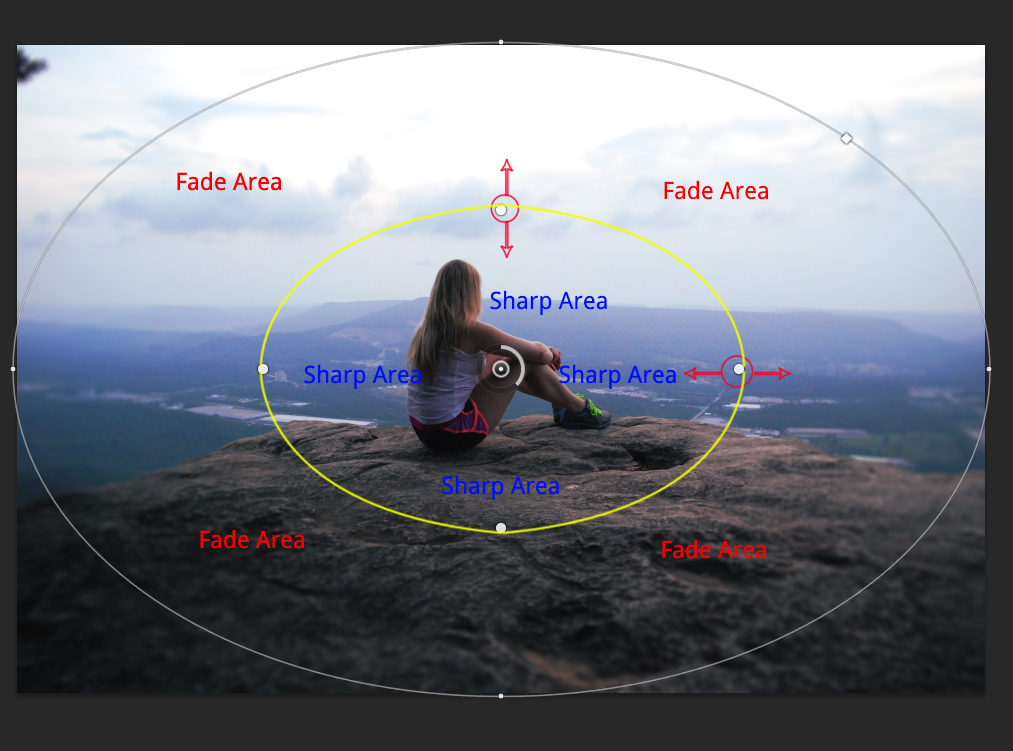
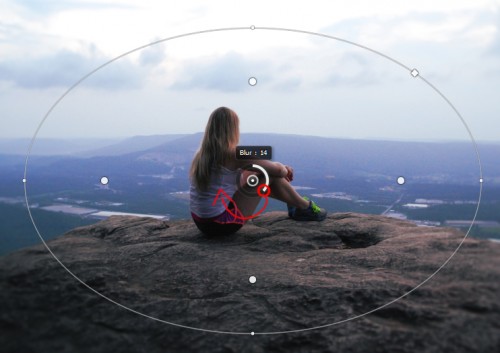
Second step: Go to the Select Filter, then choose Blur and go for Iris Blur. You’ll get the Blur Gallery tool. When you select your effect just shift the ring in the middle to the part of your photo that you want to remain sharp.
Third step: In this step we are going to click and pull the external border of the range to modify the extent of the blur. Just click on outer side of the range and pull slantwise to rotate the range. With this action we create space that is called the Blur Area, because this piece of the photo will obtain the full strength of the blur effect. If case you’ll need to make your photo more powerfully blurred, make the range lesser and the external area of the range larger.
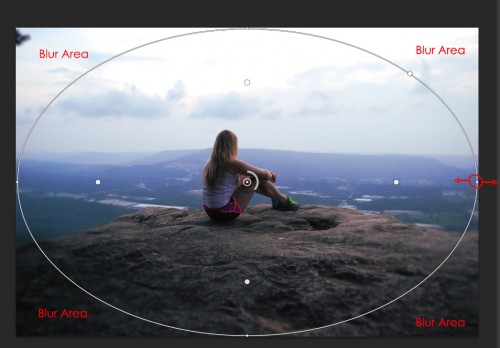
Fourth step: Now it’s time to shift the small white cube in the upper-right to create the range more rectangular or oval. For this photo I decide to maintain the selection oval so that the angles would be more strongly hazed.

Fifth step: We are going to correct the handles that appear like small white rings to edge which element of the photo we want to be as sharp as it can be. The region among these handles and the range is called the Fade Area. In that particular area our photo will slowly modify from sharp to blurry. The area inside the handles is the Sharp Area, and will stay in full focus.
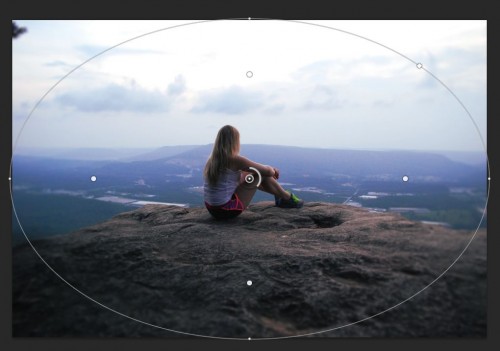
Sixth step: Now we are going to fiddle with the strength of the blur. There are two ways we can do this action. First is by clicking within of the slim ring in the middle and dragging it clock-wise, or the second option is to use the Blur slider little bit on the right.
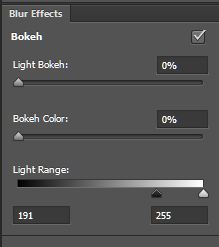
Seventh step: On this step we will brighten the Blur Area of the picture to create more lively colors. Just go to the Blur Effects and regulate the Light Bokeh slider. This tool is particularly helpful for photographs taken at nighttime or indoors. Alter the Bokeh Color slider to boost the brightness of the colors in the faded areas. Regulate the Light Range sliders to choose the variety of tones Blur Effects settings will change.
Eighth step: Check the box on the top od the dialog next to “High Quality” and Photoshop will be rendering a full-quality blur. If you want you can click wherever else on the image you want to make extra Iris Blur filters.
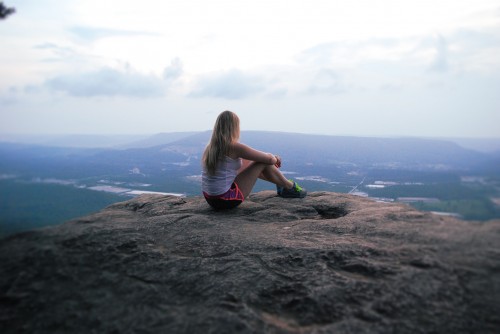
And that’s it. Our photo is now having shallow depth of field!
About the Author: Garlak Theodorakis
 My name is Garlak Theodorakis, I am graphic designer with almost 10 year experience in the field. Founded Tooft.com in january 2010 with idea to share my knowledge with the world.